🚀 Guide to Install Our Quizix Client on Vercel
Quizix is a modern application where the frontend (client) is built using Next.js and Tailwind CSS, and the backend is developed using Laravel.
In this guide, we will focus on deploying only the client part on Vercel. The backend should be hosted separately on platforms like AWS, DigitalOcean, Azure, VPS or cPanel.
📁 Project Structure
The client.zip file contains the frontend source code for Quizix. Extract this file before beginning the deployment process.
⚙️ Prerequisites
Make sure you have the following installed:
- Node.js (v18 or later recommended)
- npm
- Git (for GitHub method)
- Vercel account (https://vercel.com)
- Vercel CLI (for CLI method)
🔧 Installation Methods
You can deploy the Quizix client on Vercel using two methods:
- Using the Vercel CLI
- Using the GitHub integration
1. 🚀 Deploy Using Vercel CLI
Follow the steps below:
✅ Step 1: Extract and Navigate
Extract the standalone-client.zip file and open the terminal in that directory.
✅ Step 2: Install Dependencies
npm install --force
✅ Step 3: Build the Project
npm run build
✅ Step 4: Edit vercel.json
Open the vercel.json file and update the name and framework fields:
{
    "env": {
        "NEXT_PUBLIC_API_BASE_URL": "https://app.quiz.com",
        "NEXT_PUBLIC_BASE_URL": "https://quiz.com",
        "NEXT_PUBLIC_TOKEN_NAME": "007-g5"
    },
    "build": {
        "env": {
            "NEXT_PUBLIC_API_BASE_URL": "https://app.quiz.com",
            "NEXT_PUBLIC_BASE_URL": "https://quiz.com",
            "NEXT_PUBLIC_TOKEN_NAME": "007-g5"
        }
    }
}
✅ Step 5: Deploy to Vercel
vercel login
After logging in, run the following command to deploy the project:
vercel deploy
2. 🚀 Deploy Using GitHub
Follow the steps below:
✅ Step 1: Extract and Navigate
Extract the client.zip file and open the terminal in that directory.
✅ Step 2: Install Dependencies
npm install --force
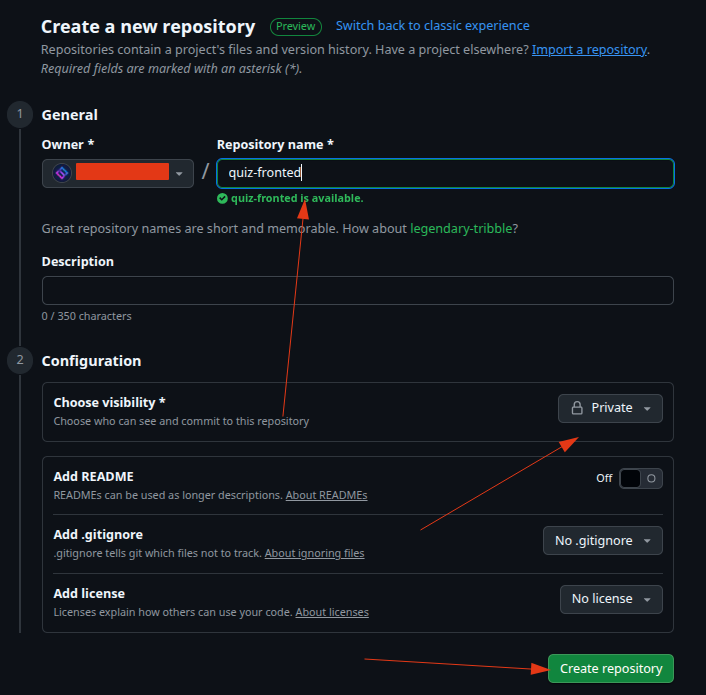
✅ Step 3: Create a GitHub Repository
Go to GitHub and create a new repository.

Enter a name for the repository and click "Create Repository".
Now you will see a new repository in your GitHub account and copy the repository URL.
✅ Step 4: Initialize Git
git init
✅ Step 5: Add and Commit Files
git add .
git commit -m "Initial commit"
✅ Step 6: Add Remote Repository URL Copy from the repository URL
git remote add origin https://github.com/username/quizix.git
✅ Step 7: Push to GitHub
git push -u origin main
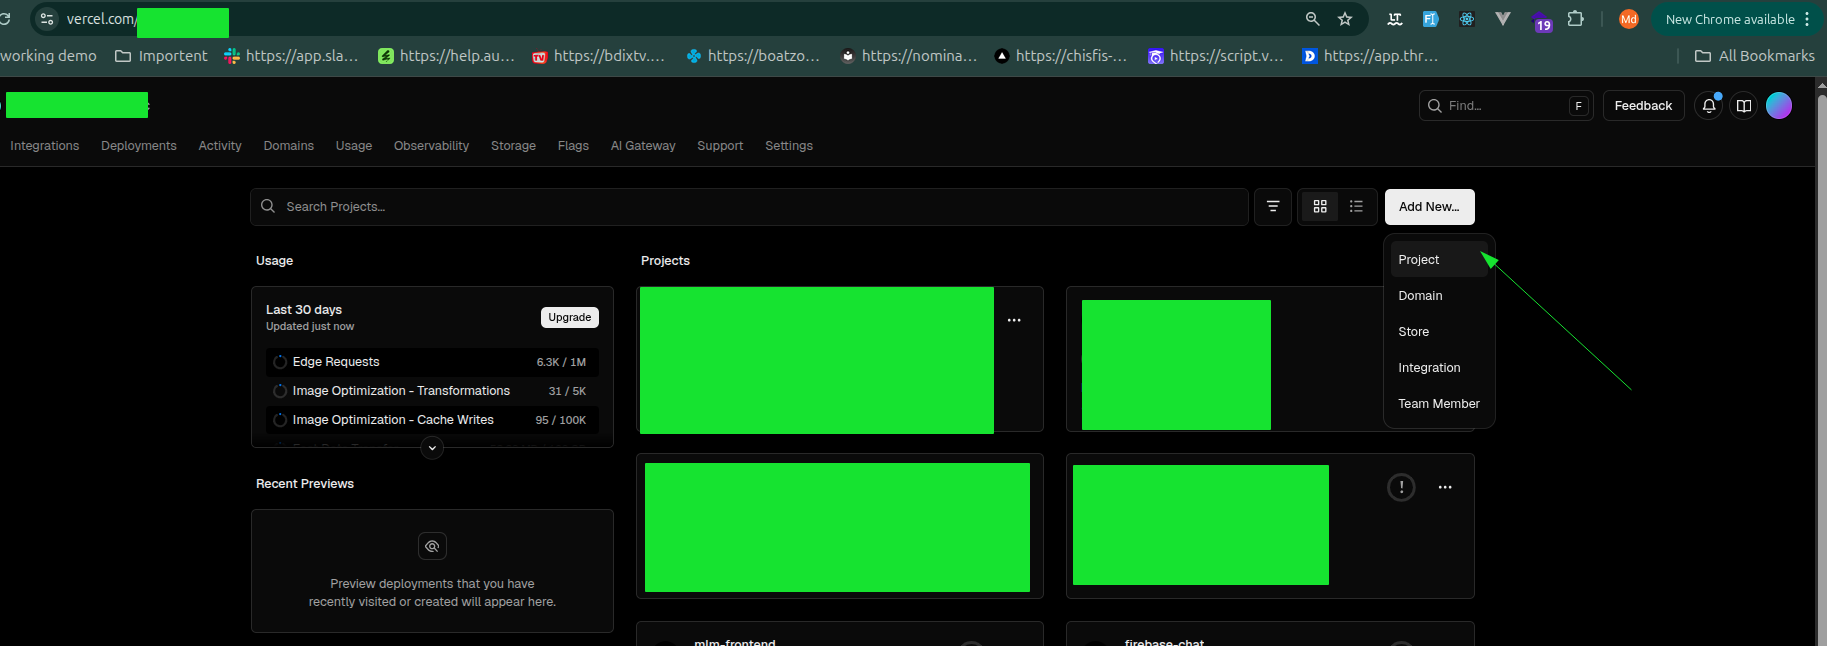
✅ Step 9: Connect to vercel
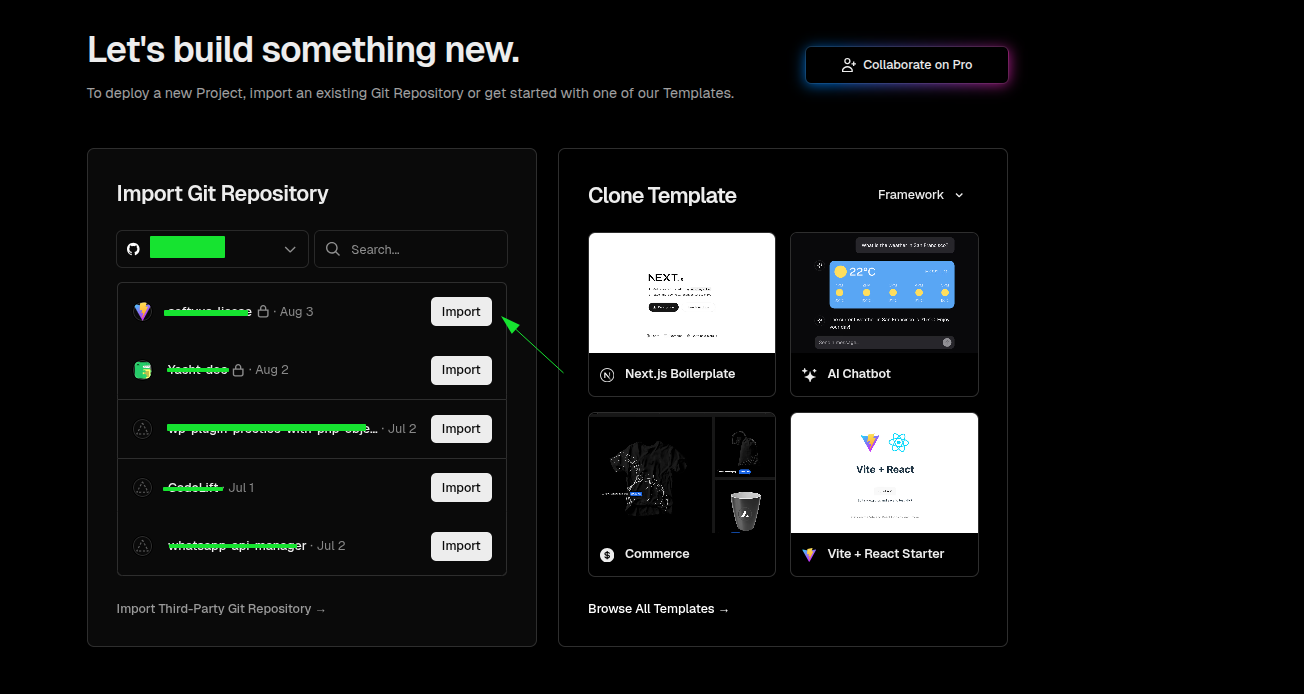
- Login to Vercel and create a new project.
- Connect the GitHub repository to Vercel.
- Deploy the project.
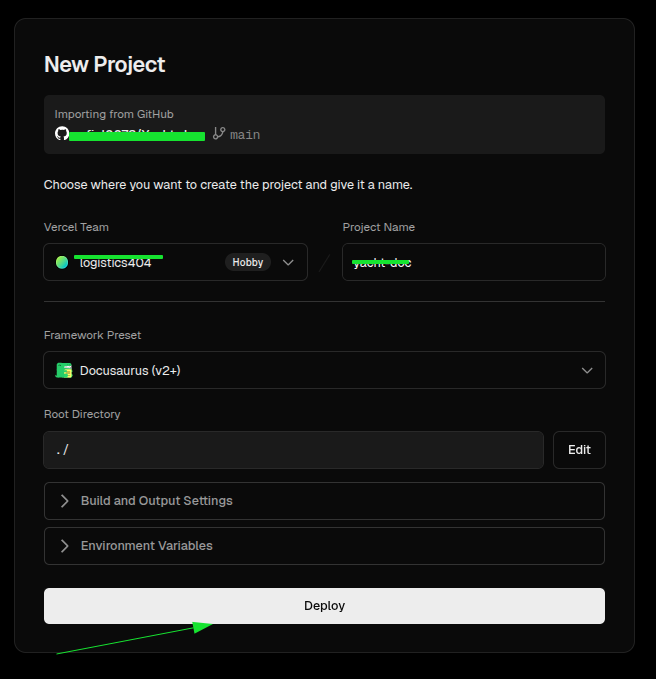
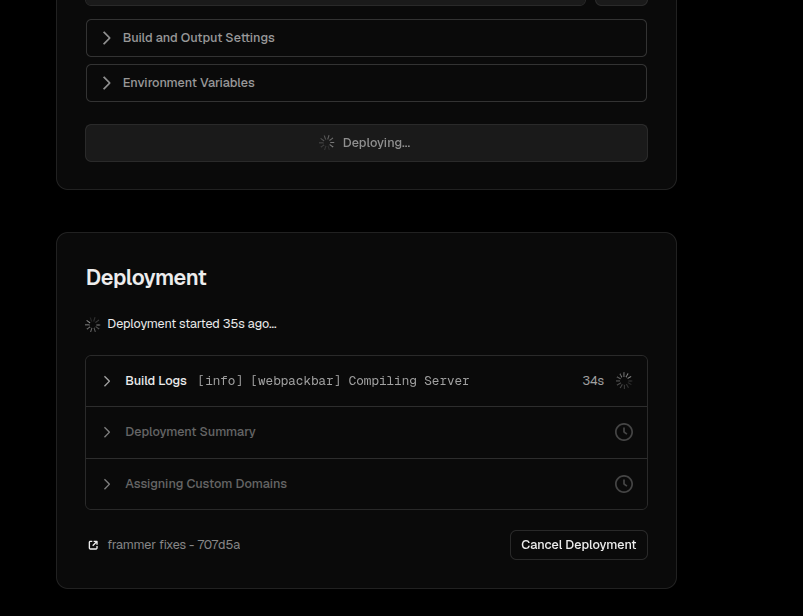
- As you can see the project is deploying.
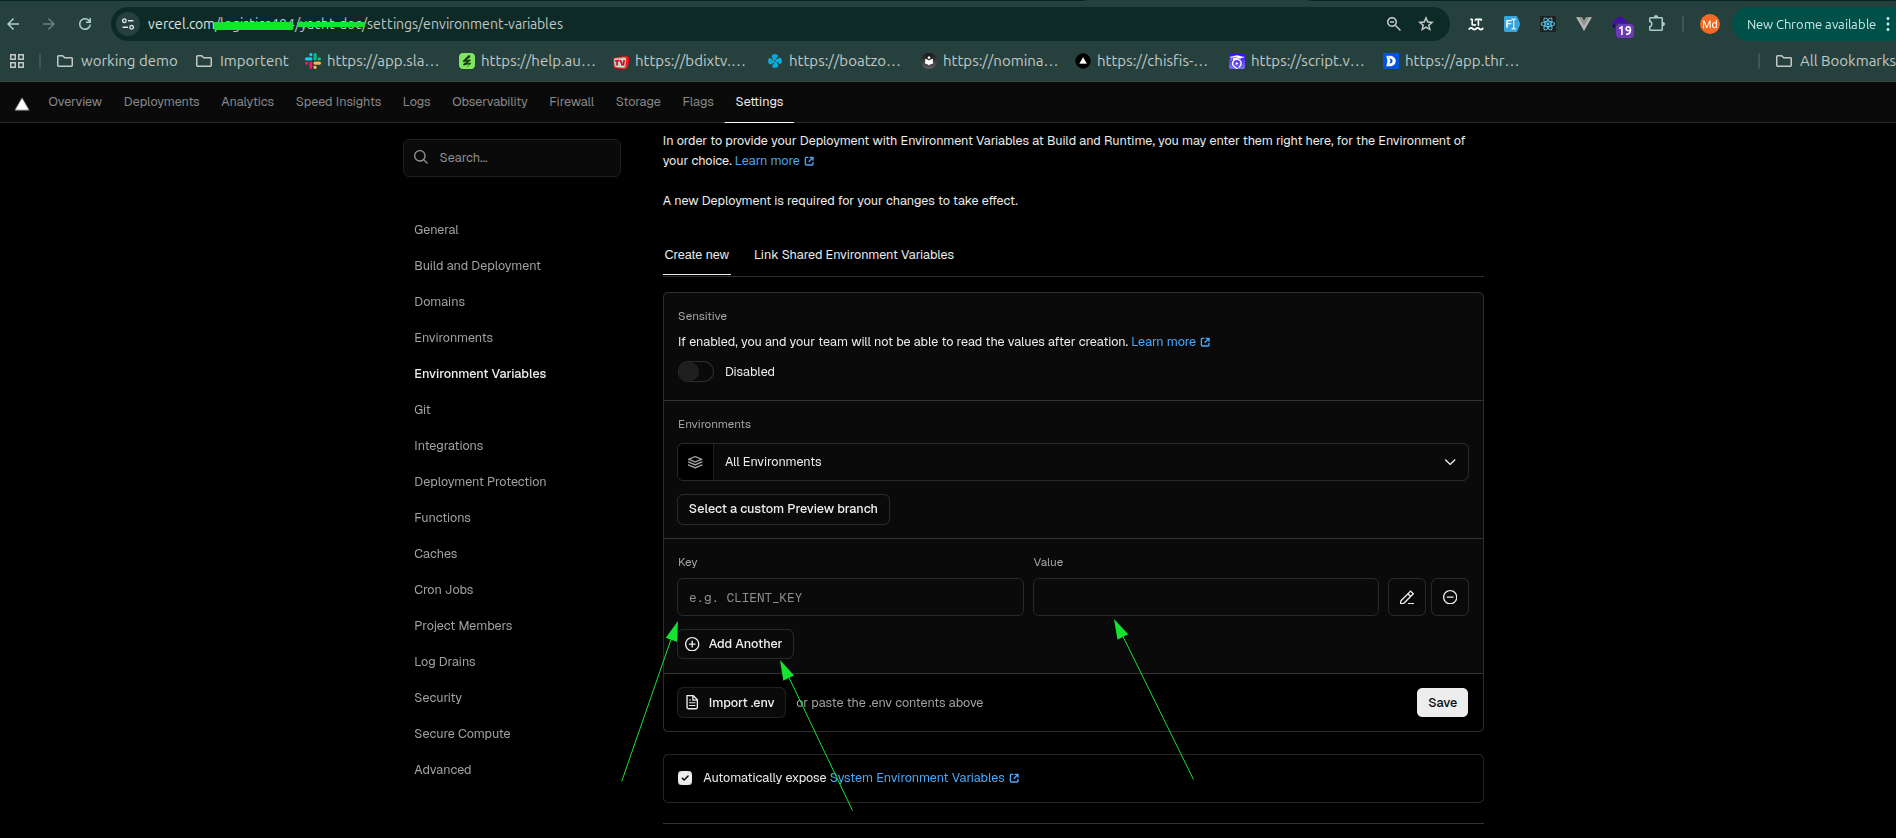
How to setup environment variables.
- Go to the project settings.
- Click on "Environment Variables"
    "NEXT_PUBLIC_API_BASE_URL": "https://app.quiz.com",
    "NEXT_PUBLIC_BASE_URL": "https://quiz.com",
    "NEXT_PUBLIC_TOKEN_NAME": "007-g5"
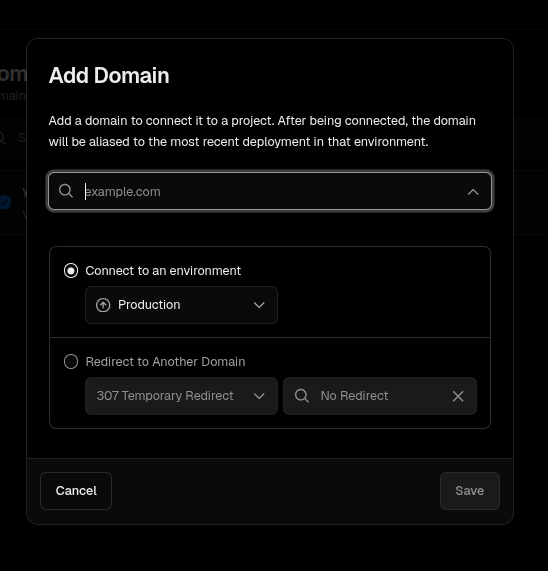
How to setup domain.
- Go to the project settings.
- Click on "Domains"
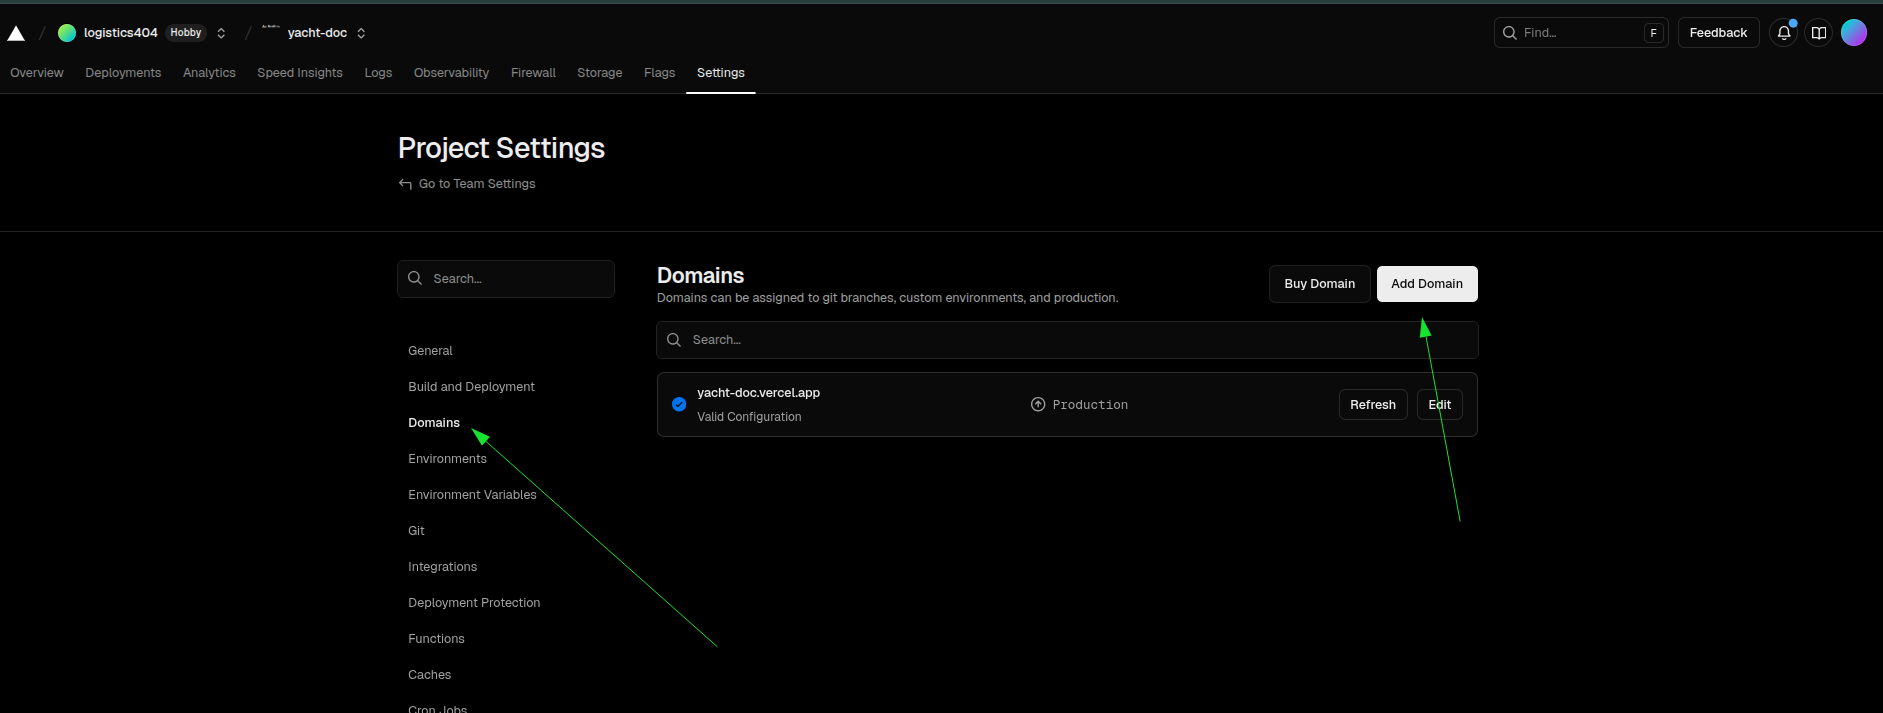
Enter your domain name.
If all the steps are successful then your project is deployed successfully. and you can access your project from your domain name.